I love using freezer paper to make stencils so out came my big roll of butchers wrap :) If you haven't seen it before it looks just like brown craft paper on one side and the other has a shiny waxy side which normally is the side you would wrap your meat or other food to be frozen on but it also works as an awesome peel and stick paper for creating paper stencils!
You can cut it down to regular letterhead sized paper, 8.5 x 11 inches and run it right through your printer to. Just make sure you place it in your paper tray so that you print on the paper side and not the waxy side *grin*.
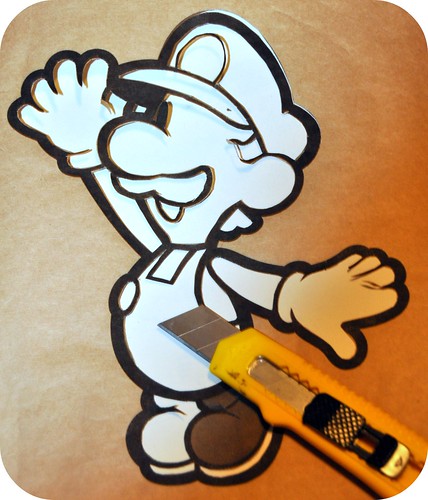
So I found a really simple image of Luigi online, printed it directly onto my freezer paper and started to cut out all of the pieces that I wanted to replace with paint instead using my exacto knife. A smaller craft knife works really well to and is nice for small areas but I have misplaced mine so I had to go with the big knife *grin*.
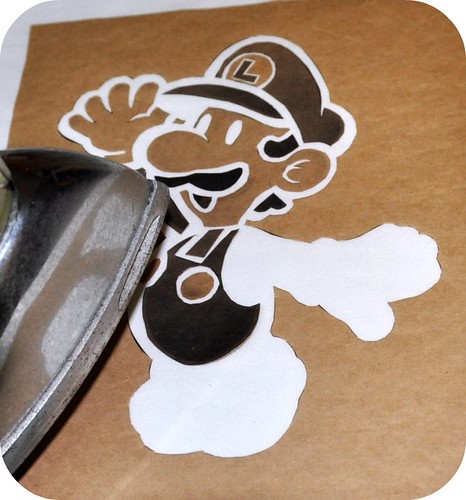
Using a dry iron with no steam I ran it gently over top of the paper parts until they were all glued into place. It only takes a second or two for the freezer paper to bond to the fabric but you can double check all edges of your stencil before you start painting to make sure they are securely attached to the fabric so that no paint will seep underneath when you start. If you find a loose spot just run your iron over it again and press down a bit and it'll fix it right up :)
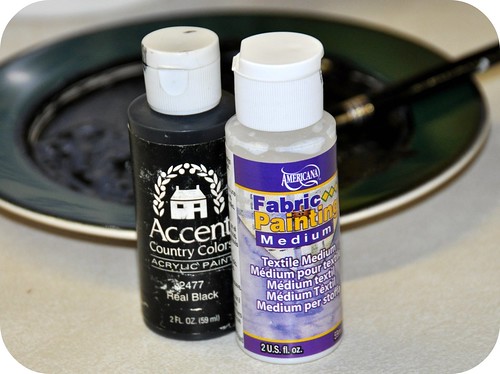
Now that you are ready to start painting you can either use a fabric paint or you can use any regular acrylic paint that you have on hand. I always use plain old acrylic paint as we always have tons of it and to turn it into a permanent fabric paint you just need to use a little bit of 'fabric medium'.
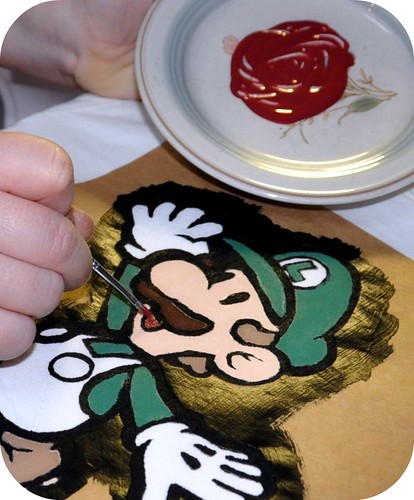
My favorite medium to use is Jo Sonja's but they were all out when I went to pick a new bottle up so this time I'm using the Americana brand. So for each color I wanted to paint with I used 2 parts acrylic paint to 1 part fabric medium. Mix it all together really well and paint directly onto your shirt :)
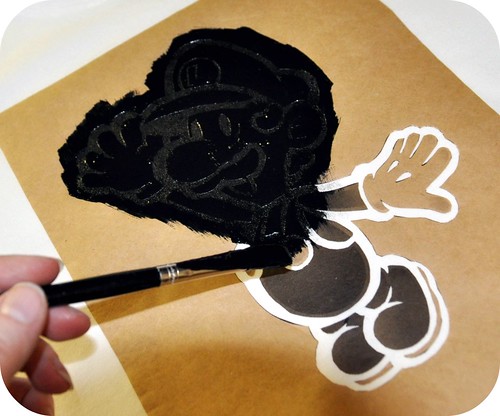
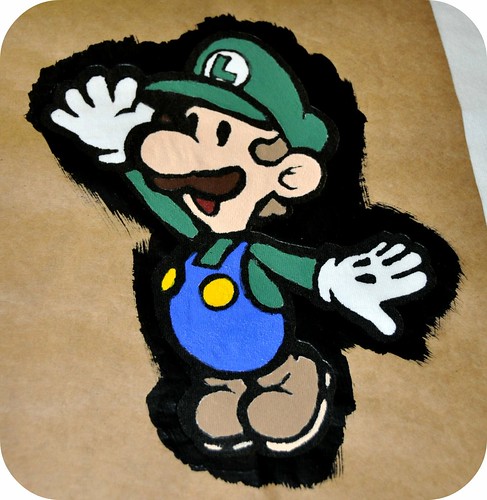
For my Luigi I wanted to do all of the black outline lines first so that is the portions of my freezer paper stencil that I removed and I brushed in a layer of black paint and hung it to dry overnight.
When I woke up this morning the first layer of black paint was nice and dry so I peeled off all of the freezer paper bits that were still attached to the shirt leaving behind all of the perfect white spots where I could now fill in all of the colors that make up Luigi's clothing and body :)
Section by section I slowly mixed paint and filled in the blanks. Sort of like a paint by number project *grin*. I think he turned out pretty well :)
Once you are finished painting everything, hang your shirt somewhere to dry again for another 12 - 24 hours to really let the paint cure.
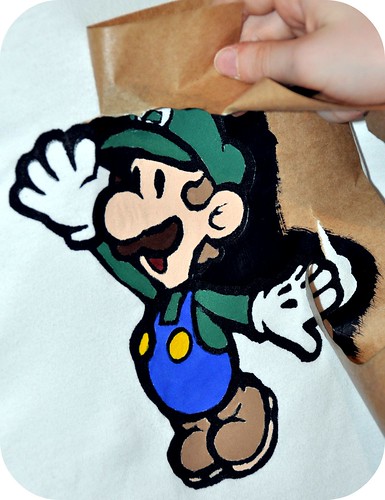
I didn't quite wait the full 12 hours for mine to finish drying but I wanted to pull off the last of the freezer paper to just show you how it looks when you are finished :)
I love how you can create such detailed images by peeling and sticking little bits of paper to fabric like this without needing to do any sort of screen printing process.
Tomorrow morning it will have been a full 24 hours that my little Luigi has been drying and then I can use my iron on the no steam setting again and heat set the paint permanently setting it onto the fabric. I have had great success using fabric medium. The kids have quite a few shirts done that we did together and they go in and out of the wash constantly and look just as great as the day we painted them. Minus a few ketchup stains here and there *grin*.
Have fun making some of your own!
Hugs,
Rosina
PS. Looking for more crafty ideas or inspiration? Pop over to Natural Suburbia's Creative Friday and see what others are up to :)




 Click the Instagram link above to follow me :)




7 comments:
That is a brilliant idea and a great tutorial. The T-shirt you made looks fantastic
i was doing freezer paper stenciling last night!! i will share pictures soon.
we LOVE our valentine!! such a fun idea to swap. xoxo
What a great idea! Ever since Ella was born we've made Daddy a t shirt with her hands (first one was her 1 month old feet). Now that she's 5, just hand prints are getting too boring. I'll have to keep this idea in mind for next time.
Paula
You did a great job, thanks for the tutorial!
thanks for the great tutorial, I can't wait to try it with my boys, they are going to love it. Your Luigi turned out very nice :)
It looks amazing! Thanks for the tutorial, I will definitely by trying my hand at this.
I want to give a personalized gift likeTshirt for my loved one. I wanted it to be artistic and very colorful.
Redbubble T Shirt
Post a Comment