Showing posts with label Valentine's Day. Show all posts

Tuesday, February 14, 2012

Happy Valentine's Day

Valentine Candy Apples

Oh did we have fun today!
We munched on our special candy apples...

Chocolate Fondue

stuffed ourselves silly with fruit and chocolate fondue...

Mini Whole Wheat Pizzas

enjoyed mini whole wheat pizzas...

Chocolate fondue

and got really, really, really sticky *grin*.

Hope you all had a great Valentine's day to!

Hugs,
Rosina

Monday, February 14, 2011

Happy Valentine's Day

Happy Valentine's day

Happy Valentine's Day!!

We celebrated valentine's day yesterday, a day earlier because my daughter had a date with the dentist again today. So we thought it best to have our party ahead of time so that she could really enjoy it :)

Yummy

We had egg sandwiches and little cucumber and cream cheese tea sandwiches, asparagus rolls, ants on a log (the kids love these)....

Valentine Treats

and of course loads of yummy sweets :)

Valentine Treats

My special treat for the kids was one of the yummy-licious candy apples that the Rocky Mountain chocolate factory makes :) When we were in the city on Friday I took them all into the shop and let them stand in front of the giant glass case full of them and let them pick any one their hearts desired *grin*.

You should have seen them agonizing over which one looked like it was going to be the very best one to take home LOL.

Valentine Candy Apples

A sweet treat for such a sweet day :)

Hope you all had a wonderful valentine's day to :)

Hugs,
Rosina

Saturday, February 12, 2011

Valentine Sugar Cookies

Valentine Hearts

We're getting ready for Valentine's day and making special treats :)
We always make a heart shaped cookie for our party and this time we made sugar cookie sandwich hearts with a yummy jam center. So good! I only know this because there may have been a little bit of taste testing going on as they were being made *grin*.

Let's Get Cracking

L was all ready to get down to business and had her new little apron that she made tied on and her hands washed even before I could ask her to do anything :) She loves to crack the eggs for me and run her hands through the flour *grin*.

Flour Fun

I used my favorite sugar cookie recipe but halved the batch this time so that we didn't end up with mountains of cookies. You will need:

3 eggs
1 cup sugar
1 cup unsalted butter
1 tsp. vanilla
1 tsp. baking powder
2 1/2 cups all purpose flour

Cream the sugar and butter together and add in your eggs and vanilla beating until everything is light and fluffy looking.

Making cookies

Add your flour and baking powder and mix until just combined. Turn out your dough onto a sheet of waxed paper and top with another sheet of wax paper so that you can press down on your dough flattening it out towards the perimeters of your paper and then place it your fridge to chill so that when you pull it out again it will be nice and easy to roll and cut out your hearts on :) Bake at 350 degrees Fahrenheit for about 8 - 10 minutes or until your cookies are just browning on the bottom edges.

Heart Cookies

We used two different sized heart cookie cutters to create the tops of the cookies and then we ran a line of icing around the edge of the bottom cookie to create an icing dam so that our plum jam wouldn't squeeze out when we sandwiched the two layers together :) I make my jam without pectin so they are always a little bit runny and the icing works perfectly to keep everything in it's place *grin*.

I had to hide them out in the garage tonight to keep the kids from asking for more and so that I wouldn't sneak into the kitchen and nibble on them for a midnight snack LOL. I have terribly weak will power!

Hugs,
Rosina

Thursday, February 3, 2011

Pretty Little Heart Garland

Heart Garland

The last two little handprint valentine cards that we made the other day have been addressed and are waiting to be dropped into the mail to their lucky recipients in different places across the US and Mexico :)

In one of the emails while exchanging addresses we chatted about how we as parents have just as much fun with these little exchanges as our children and you know it is so true! My children are crazy about receiving mail since it isn't an every day occurence for them and I have so much fun making the swaps with them and checking the mailbox right alongside them everyday for packages to *grin*. So when I found out that two wonderful mama's wanted to send us cards in return I was thrilled! I can't wait to see their surprised faces when they find those envelopes in the coming weeks :)

I've been crocheting up a storm today. I found a great little heart pattern at A Foothill Home Companion and it is so nice and easy that you can whip up a heart in a matter of minutes which is a good thing if you plan on making a large garland *grin*.

I didn't have any natural colored yarn for the chain so I thought it would be fun to crochet up some raffia which if you haven't seen it before has a papery texture but is made from plant fiber :) I think that it will make a nice addition to our valentine tree this year :)

I was asked what yarn I used and I thought that I would quickly add it here just in case you would like to know as well :) It is Red Heart 'Luster Sheen' 2ply sport/fine weight and the color is Cherry Red #0915.

What valentine decorations are you making this year?

Hugs,
Rosina


PS. Looking for more crafty ideas or inspiration? Pop over to Natural Suburbia's Creative Friday and see what others are up to :)

Thursday, January 27, 2011

Valentine Handprint Cards & One For You

Valentine Handprint Card

Valentine's day is just around the corner and every year we make something special to give to Omi and Opa. Last year we made valentine paper bag books and this year I thought it would fun to get really messy and make handprint heart cards :)

Valentine Handprint Card

No kid can resist having their hands completely coated in paint!

Valentine Handprint Card

The trick is to get them to keep their hands on the paper and not their faces, walls, chairs, oh and hair... hair is a really good one to keep sticky paint covered hands out of *grin*. Why is it that as soon as they know that they aren't supposed to scratch a body part it becomes mysteriously itchy??

Valentine Handprint Card

With our watercolor paper folded in half and each hand thoroughly covered in red paint we then placed them onto the paper doing our best to keep our thumbs slightly bent and our pointer fingers touching to make a lovely handprint heart :) To be fair we did a couple of practice runs on scrap paper before doing our 'good' cards so that we could perfect our heart making technique :)

One tip before getting your little one to stick their hands to the paper is to make sure that you have your card upside down or the opposite way that you would want it to stand when it is complete. That way your heart will display right side up. We made that mistake the first time and when we stood the card upright to dry we realized that the heart was actually upside down *grin*. Still cute but my little guy was not happy his heart didn't look quite right!

Valentine Handprint Card

To give each of our cards a little shimmer we sprinkled glitter over the wet paint and then using our alphabet stamps my daughter stamped 'Be Mine' and 'I ♥ U' in the center of the handprint hearts for sweet little Valentine messages :)

Valentine Handprint Cards

I just love how cute they look all lined up on the table drying :)

We got a little carried away with making handprints and ended up with more cards than we actually need so if you or your children would like a little surprise Valentine card sent to you in the mail just let me now in the comments below :)

The first five commenters will have one personally sent to you by my little heart handprint creators *grin*.

All of the Valentine cards have now been spoken for :)

Hugs,
Rosina


PS. Looking for more crafty ideas or inspiration? Pop over to Natural Suburbia's Creative Friday and see what others are up to :)


Tuesday, February 9, 2010

Valentine Paper Bag Books


We're seriously obsessed with Valentine crafts this year! Today we made super easy paper bag books and filled them with little love notes :)

If you have never made a paper bag book you've got to try it and they can be used for scrapbooking, homeschool projects, personalized for special gifts like our Valentine's book and so much more. Basically all you need is standard paper bag lunch bags and a stapler. After that it's up to you as to how fancy or simple you want to make them.

Strawberry Lunch Bag 139Strawberry Lunch Bag 140Strawberry Lunch Bag 143

We took 3 paper bags, stacked them all on top of each other with the open ends all at the same end and then folded them in half like one giant paper from top to bottom creating a little booklet. To secure them together I used my stapler and put 3 staples parallel to the fold down the length of the book.

Valentine book

I really cheated for the front of the book *grin*. The pretty red heart paper that it is covered with is actually a napkin! We picked them up at the dollar store for our upcoming Valentine's party and I opened one fully and cut off a square, gluing it on for the background. Worked out fabulously layered with the little red & white heart for the title of the book!!!

Gotta love cheap crafting *wink*.

valentine book

Making heart templates using one of our cookie cutters we traced 5 hearts in white cardstock and 5 hearts in the red cardstock. I made sure to cut the red heart out about a 1/4 of an inch larger than the tracing line so that it would create a nice color contrast behind the white heart.

We glued in each of the layered hearts only on the left hand side of each set of open pages so that it created fun little spaces to draw happy pictures :)

valentine book

A paper bag book made with 3 bags will create 3 little pockets on the edge of your book for hiding little notes or trinkets inside. Since ours is a Valentine booklet we decided to use the little pockets for love notes *grin*. Taking a sheet of white cardstock I cut it up into 3.5" x 4" rectangles and then we stapled on bright colored ribbons to the narrow end of the rectangle creating a little pull tab for our notes.

valentine book

I just love how cute it turned out with the staggered ribbons hanging out the side of the book. And if I think it's cute then you know my 6 year old is over the moon with how it's coming together! LOL

valentine book

The final touches were for her to actually write her little love notes to be tucked inside :) I helped her by writing down the sentences she wanted to write and then she copied them herself onto the card stock.

You'll have to wait to see her finished drawings on the little heart frames inside as they are 'top secret' and mama is not allowed to see them until Valentine's Day *grin*. Have fun making a little booklet of your own!

~ Rosina

Monday, February 8, 2010

Flickr Favorites ~ Hearts


1. Sweeter Love, 2. My heart is yours (365/280), 3. Ispahans, 4. Corazón partio (39/365)

Valentine's day is just around the corner :) We've been bustling around making valentine cards, little felt hearts with 'I ♥ You' embroidered on them and planning our valentine tea party that we have every year.

Heart'felt' Heart

So much fun, and I was excited this morning because our little 'I ♥ You' felt hearts were featured on Sew Mama Sew's blog today in a Valentine craft round up :)

I'd love to know what special things do you do on Valentine's Day?

Want to share your flickr favorites to? Visit Mitsy over at Artmind and join in the fun!

~ Rosina

Friday, February 5, 2010

Heart'felt' Hearts for Valentines Day

Heart'felt' Heart

When I think of Valentine's Day I think of plump little cherubs with bows and arrows, lots of heart shaped candies, and little 'Be Mine' valentine cards that you leave for loved ones in places they are sure to find them. Nothing says I love you more than a handmade gift, especially when it is made by a child. These little felt hearts are sure to bring a big smile to mom, grandma, aunty, or whomever you pick to share one with this Valentine's Day.

I actually wrote this article in the fall of 2008 for a Canadian homeschool magazine, but the article never made it to print as the magazine folded before it was Valentine's Day. So I thought I'd dust it off and share it with all of you :)

Heart'felt' Hearts

Below are the basic supplies needed to make your felt hearts plus a great practice heart for preschoolers that aren't quite ready for a needle and thread yet. All of this can usually be found very inexpensively at your local dollar store.
Heart shaped template on cardboard
Felt in multiple colours
Embroidery thread
Craft foam sheets
Magnets (optional)
Hole punch
Scissors
Needles
Buttons
Ribbon
Stuffing

Heart'felt' Heart

Start by making yourself a heart shaped template on cardboard. We used a large cookie cutter for our pattern, but you can easily draw your own if you don't have something to trace. The cardboard will make a nice stiff pattern for your child to trace around with a pen or marker onto your colored felt and then have them cut it out with a sharp pair of scissors. Plastic kindergarten scissors will not cut through felt very easily if at all, so you may want to pre-cut some hearts for your younger children if you don't feel comfortable with them using larger scissors. Once you have your two heart pieces cut out you can start to decorate the one which will be the front of your completed heart with some simple embroidery stitches.

Heart'felt' Heart

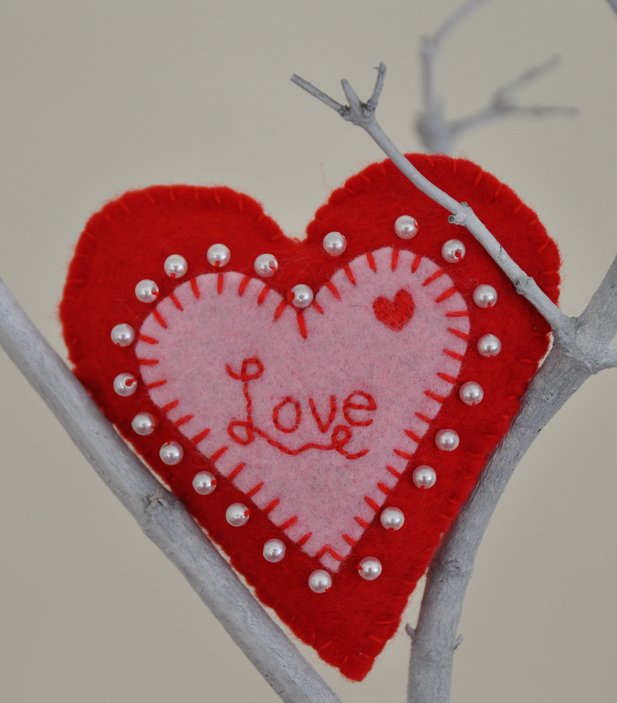
My son really wanted to make a heart with a little phrase on it. So we used a smaller heart inset into a larger heart as shown above and instead of having him stitch the complete words we used the letter 'I' along with the heart and the letter 'U' to symbolize I Love You.

Heart'felt' Hearts

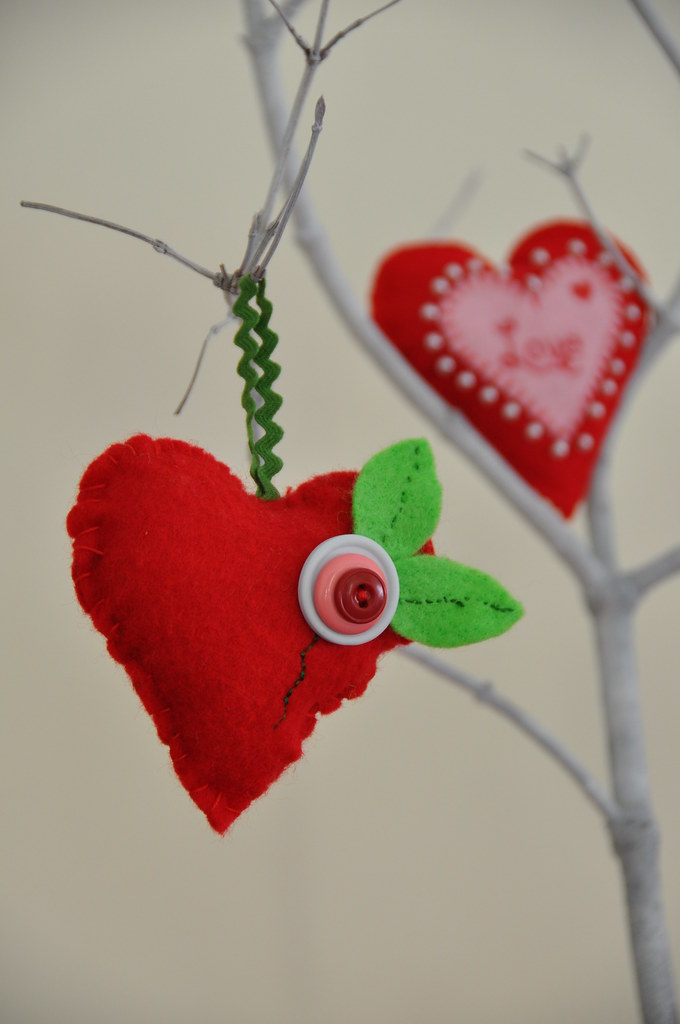
Many of us have younger children that really want to sew just like big brother or big sister but need something really simple, so how about buttons? They are great for beginning sewers since all it requires is to go in and out of the holes, plus you can put a few stitches in first to secure it and they can loop around to their hearts desire. We created a cute little button flower by sewing three buttons on top of each other, adding on two green leaves which my five year old stitched some lovely veins onto and there you have a super easy flower to embellish your heart with. But let's not forget about the preschoolers! Who says you need to have a needle and thread to sew? You can make a quick and easy heart shaped lacing card out of a sheet of craft foam by punching holes around the edges of the heart with a hole punch and using a piece of ribbon or a shoe lace as the thread to weave in and out of it. Now you've created sewing fun for the entire family.

Heart'felt' Heart

After you have finished decorating the front of your heart it is time to stuff it. Place the front and back pieces of your heart together with the right sides facing outwards and stitch around the outer edge with a simple whip stitch. Make sure you leave an opening somewhere around the edge so that you can get your stuffing inside. You can make it as plump as you like, and when you feel it has enough continue stitching up the outer edge until your heart is completely closed. Now that your heart is all sewn up you can attach a little ribbon hanger to the top of it or glue a magnet to the back with a little bit of hot glue so that it can be used as a fridge magnet.

The only thing left to do now is decide on who to give your heart to :)
Check out another one of our Valentine entries from last year to see what we did with all of our little felt hearts by making a Valentine Tree!

~ Rosina

Saturday, January 16, 2010

Valentine's Garland ~ 'Sew' Easy To Make!

Valentine garland

We are totally into Valentine's Day mode around here! I know it's a little bit early but if we don't do it now we may not do it at all *grin*. I love paper garland and thought it would be so much fun to make a Valentine themed one.

Heart garland

I made some quick cardboard templates of X's, O's, hearts & kissy lips. Of course we had to have big kissy lips to go with our X's & O's which if you aren't familiar are for kisses & hugs. Perfect for Valentine's day :) I made the templates out of an empty cereal box and traced them onto construction paper and then my little crafty helper, L, cut them all out for me :) Kids and scissors just seem to go hand in hand so this was one fun project.

Heart garland

Then came the fun part for mom :) I took each piece, repeating them in a pattern and sewed them all together with the sewing machine. So easy!! I mean there is no work involved. The machine stitches through them without any trouble and as I finished each one I gently pulled it and the thread out in equal intervals between each piece.

Valentine garland

Done :) We swapped the kitchen curtain and put up a fun red gingham one, hung our newly made valentine garland & added some cute little tin birdies that I attached to the curtain to :)

It is so stinking cute and anyone can make this! Have fun creating one of your own :)

~ Rosina

Saturday, January 9, 2010

Polka Dots of Happiness

Dots of Happiness Treasury

Doesn't this treasury just scream 'Love Me'! *grin*.

I just got an email letting me know that my polka dot market bag had been included in this awesome mix of red. With Valentine's Day right around the corner this seems to be the perfect color. I love it, so bright and cheery :)

If you are viewing this and the treasury has now expired you can click the photo for a larger view of it and all of the shop names are there so you can search on Etsy to find any of these great items!

~ Rosina

Sunday, February 15, 2009

Valentine Party


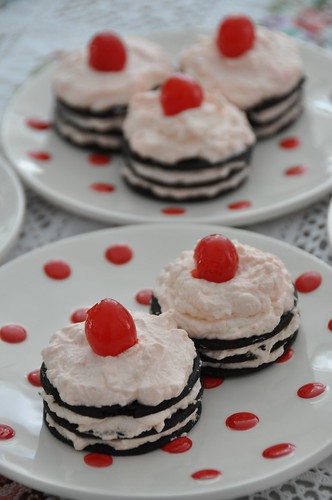
Yesterday we had our little Valentine party and it was so much fun! The kids had loads of special valentines that they had been secretly working on for Omi & Opa and we all went up for lunch at their house along with a yummy dessert :) When I was a little girl my mom used to buy these chocolate wafers making a super sweet whipped cream covered dessert with them. I hadn't thought of them for ages until I ran across them again on Little Window Shoppe's blog in a great variation of the original recipe, stacking them upright instead and topping it with a maraschino cherry :) Just perfect for Valentine's Day!


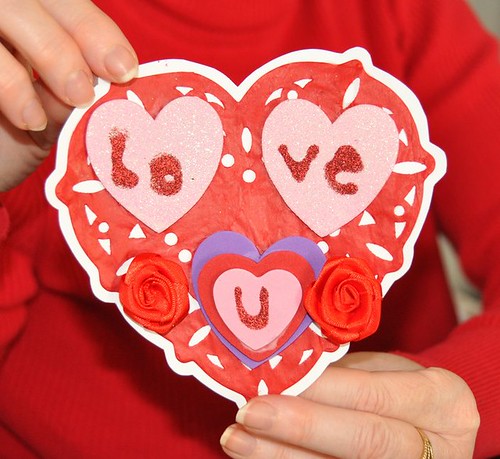
This is my lovely valentine that I received from my son.... so cute :)

~ Rosina

Friday, January 30, 2009

Will You B Mine?


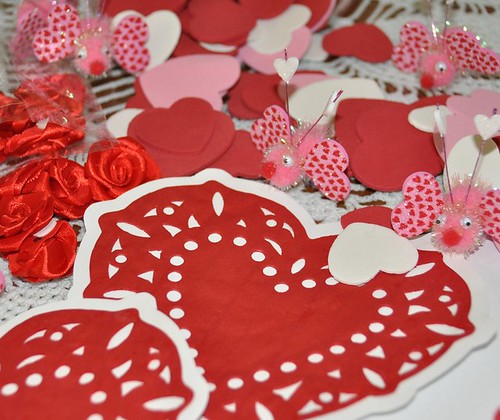
A couple of good bloggy friends and I are swapping handmade Valentine cards that our children are making for each other and with the mailing deadline of Feb.1st just a couple of days away I thought we'd better get cracking! We found all sorts of fantastic valentine craft supplies at the dollar store the last time we were in town. There were paper hearts, foam shapes, glitter, ribbon roses, and so much more. It was hard to keep to a budget and not just splurge by grabbing tons of everything. LOL.


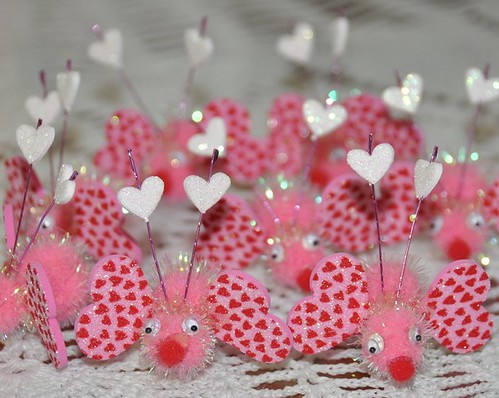
My daughter fell in love with a cute little critter kit to make these adorable 'Love Bugs' as she calls them so we made up a whole bunch of them to. Not sure what we're going to do with all of these love bugs but they're awful cute and she's having fun hiding them around the house for me to find *grin*. How about you, what sort of Valentine crafts are you up to?

~ Rosina

Tuesday, January 27, 2009

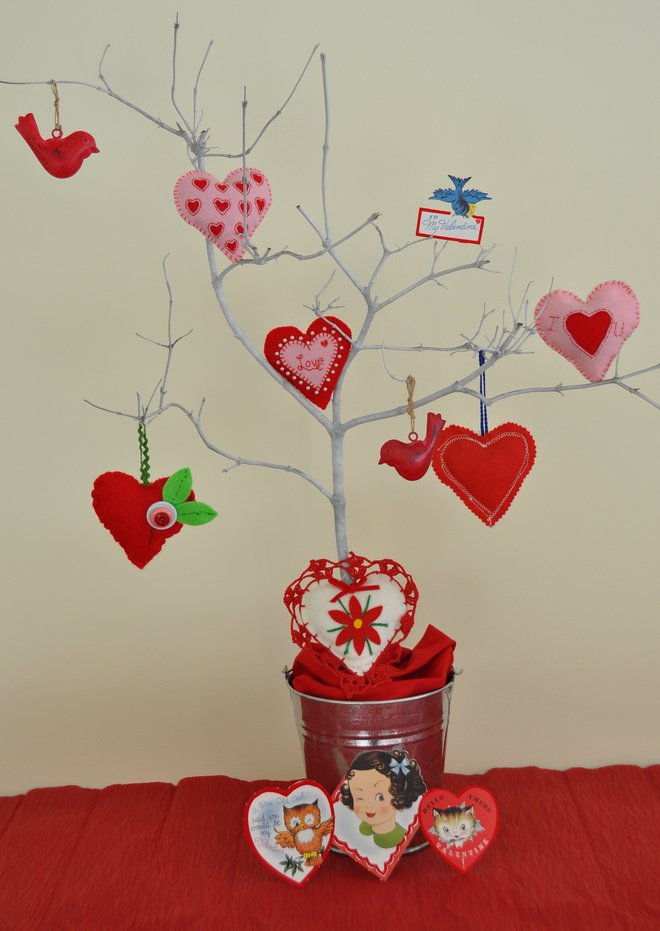
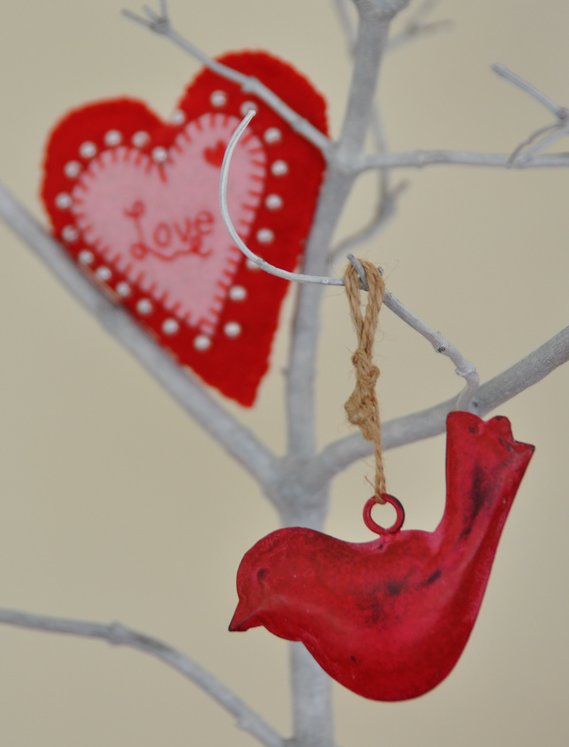
Valentine's Day Tree


Every year the kids and I decorate a cute little tree with all sorts of bunnies and Easter eggs for Easter and this year I thought that it would be fun if we had a Valentine's Day Tree.


There are so many cute valentine crafts but for some reason we have never really put a lot of thought into it before. We always make handmade valentines to give to each other with sweet little sayings inside and waaay to much glitter, but a couple of months ago I actually got really ambitious and made a plan to do something special :)


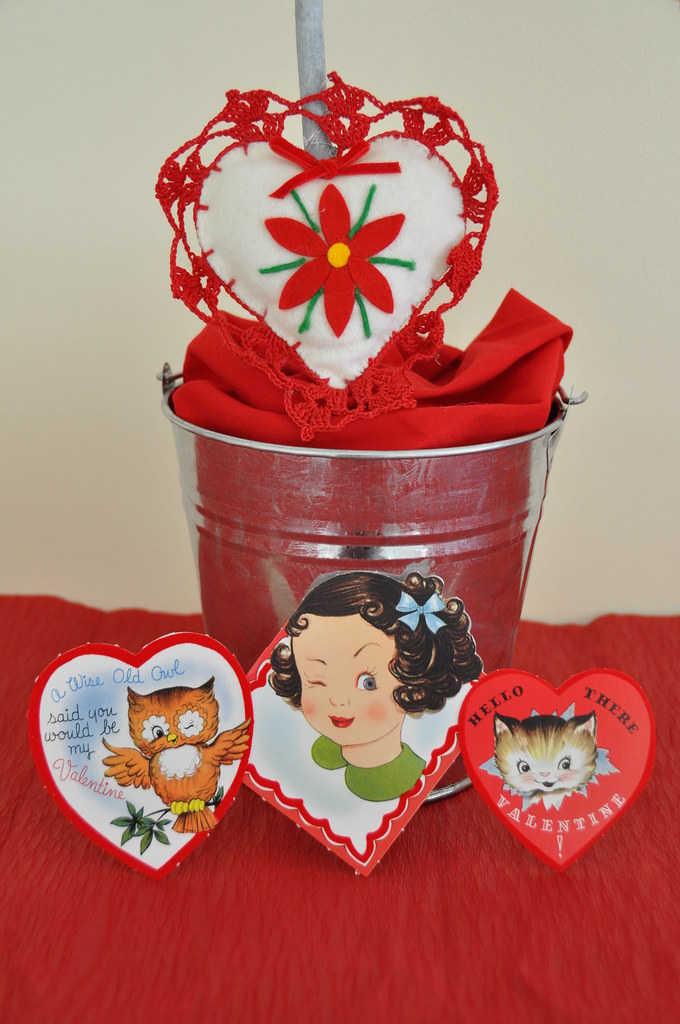
I bought some regular semi-gloss white paint in a spray can, found a suitable branch to pluck off of our dormant snowball tree outside the back door, gave it a good dosing of paint and hung it by the wood fire to dry. I then filled an aluminum pail with rocks and planted our new valentine tree inside :)


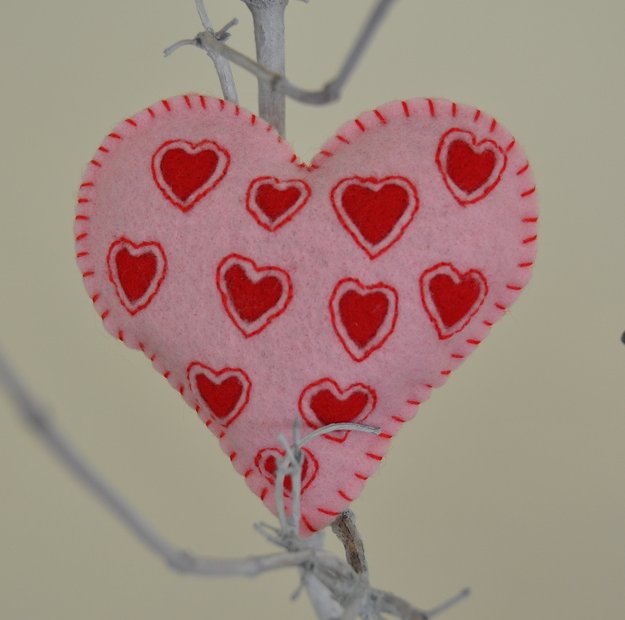
Previously the kids and I had started making cute little handmade felt hearts in an assortment of styles, using embroidery floss, pearls, buttons and more to make each one of the a unique creation.


We thought it was a bit bare with just the felt hearts so we started to raid my craft cupboards finding cute little painted birds in red to boot, and some vintage reproduction valentine's cards that I had just picked up. They are the sweetest things with flocked velvet on them, reminding me so much of when I was a little girl.


We set the entire thing down on some red crepe paper adding more valentine cards, and a another felt heart with a crocheted trim inside the pail :)


I don't know whey we didn't do this years ago!

~Rosina