Friday, June 4, 2010

A Perfect Afternoon

getting carrot bed ready

Well the sun finally broke out from behind the clouds and gave us half a day of scorching hot heat! Oh my goodness I think we have become to accustomed to all of the wet weather because we were definitely wilting this morning *grin*.

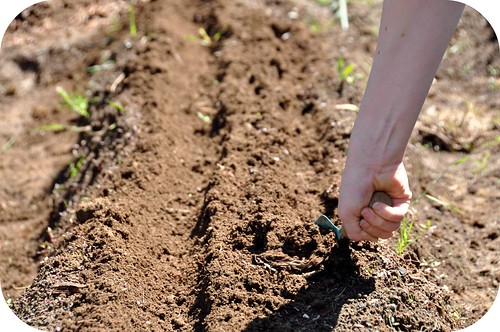
We all headed out right after breakfast to take advantage of the dry spell. K and I tackled some more planting by getting the rows ready for our carrots and beets to go in. As he dug little trenches I went behind him filling them with a mix of horse manure, lime and an organic crumble that I picked up at the nursery. We're hoping they are going to grow really big! LOL.

planting beet seed tape

Our homemade seed tape cut the work in half to! All we had to do was lay it all down in the trenches and sprinkle with a covering of dirt and we were done. Gotta love that especially as we started to go limp under the baking sun :)

painting

L & M have been literally dying waiting for the rain to stop so that they could go out and paint so while we toiled in the garden they collected the paint jars and the new canvasses that I had bought at the dollar store and got busy becoming Picasso & Kahlo *grin*. Can you believe that I actually got 12 x 16 inch canvas all stretched on a frame for $1.25?! I'm kicking myself now that I only picked up a couple. I sure hope they still have some the next time we go!
bruschetta

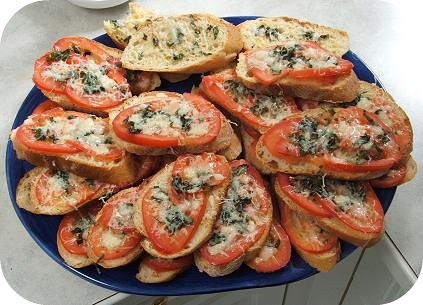
While everyone scrubbed up at the garden hose and had an impromptu water fight I headed in to get lunch together :) A nice big plate of Bruschetta. Oh how I can hardly wait until our tomatoes are ready!!

Armed with the giant plate of bruschetta and another full of vegetables and dip we enjoyed lunch under the shade of the giant hemlock trees in the backyard. While they finished up eating I read aloud from one of our new Sonlight read alouds 'The Golden Goblet'.

Ahh what a beautiful way to spend the afternoon :) I want to create a cozy outdoor spot this summer where we can curl up with books or crafts and enjoy the outdoors. I've got a couple of ideas for transforming our front patio. It has no shelter so I need to make some sort of sun shade but I'm hoping to find some fabric in the discount bin at Walmart and fashion some sails or something. Haven't quite figured out all the details yet but the thoughts are brewing *grin*.

~ Rosina

Thursday, June 3, 2010

Planting Flower Boots

flower boots

I've had a stash of the kids outgrown rubber boots in the closet since last spring as I wanted to do something fun with them. Each pair outgrown and no good for donating to the good will because every single one of them was either cracked somewhere up the sides or had holes in the soles. Can you say hard on their shoes?!

flower boots

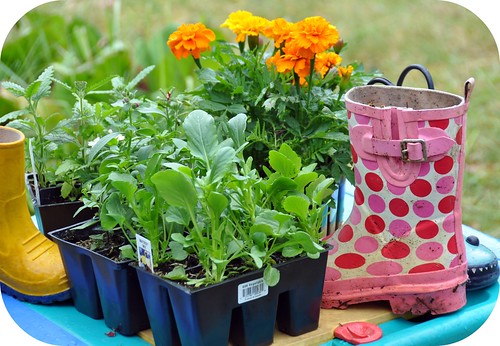
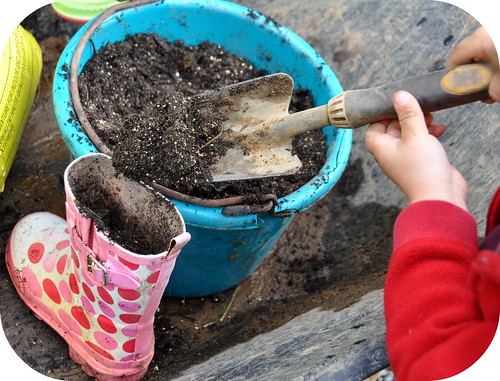
So the last time we were in the city we stopped at one of the nurseries and purchased some colorful bedding plants to plant in them :) Using a mix of potting soil and horse manure they filled up each of the boots right to the tip of the toes.

flower boots

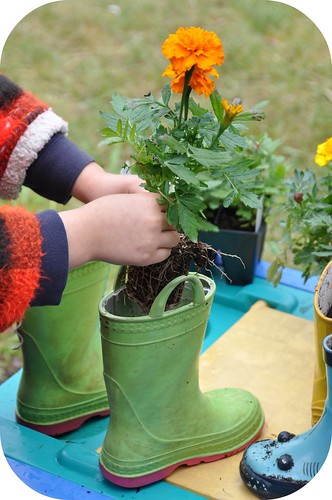
In each one we could only fit 2 or sometimes 3 flowers depending on how little the top of the boot was :)

flower boots

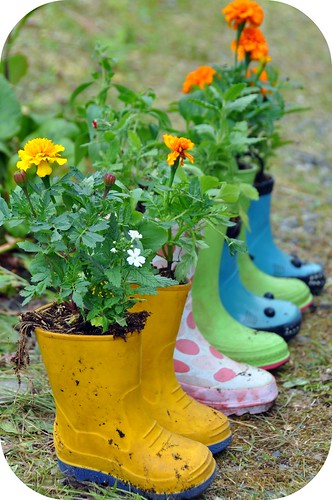
They are so excited to see the marigolds, pansies, and snapdragons bloom. I think we're going to put them in the vegetable garden at the ends of the rows. I just hope that the slugs don't get a hold of them! All this wet weather is a making it a haven for the slimy creatures. Maybe we should get some Muskovy ducks again... they LOVE to eat slugs *grin*.

~ Rosina
Wednesday, June 2, 2010

Herb-a-licious Stuffed Pork Loin ~ Recipe

This time of year always produces an abundance of fresh herbs in the garden and I'm always trying to incorporate them into our meals and this is one of our all time favorite ways to roast up a pork loin using an infusion of thyme, rosemary, and sage and I thought that I would share my recipe with you :)

Just a quick note: If you don't have any fresh herbs on hand you can most definitely substitute dried herbs in their place. A good rule of thumb is to use 1/3 of the amount in dried herbs that you would use for fresh herbs. So for the following recipe use 1 teaspoon of dried herbs instead of the 1 tablespoon of fresh :)

stuffed pork loin

Filling:

1Tbsp fresh finely chopped sage
1 Tbsp fresh finely chopped thyme
1 Tbsp fresh rosemary (bruise it by rolling it roughly in your fingers)
4 green onions chopped finely
3 large cloves of garlic minced
3 Tbsp extra virgin olive oil
2 heaping tsp dijon mustard
1/4 tsp sea salt
freshly ground peppercorns to taste
2 - 3 lb. pork loin roast

Preheat oven to 350 degrees Fahrenheit.
Combine the first 9 ingredients together in a small bowl.

stuffed pork loin

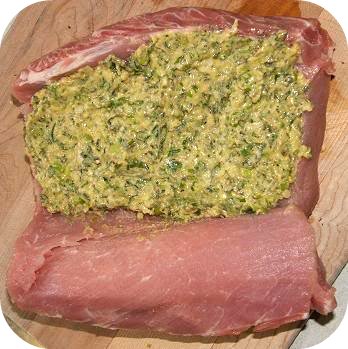
Next you need to butterfly your roast by cutting it in half but *not all the way through*! You want it to open up like a book.

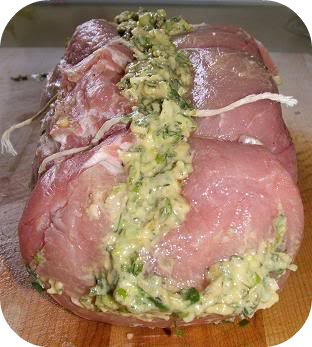
Spread your filling on one half of the roast and then start from the side of your roast with no filling on it and roll it up and tie it tightly with some butcher's twine or string like shown in the first photo. Don't worry if some of your filling squeezes out, just push it back in or pat it back on top of your roast. Once you have your roast all tied up you can give it one more dusting of salt and pepper and place it in your roasting pan with one cup of water. This will make it super moist :)

I cover my roaster with foil before I put the lid on to just so that I can keep all of that steam and juice inside the pot so that it stays extra moist! Bake for roughly 2 1/2 hours or until well done at an internal temperature of 170 degrees Fahrenheit. It usually takes mine just a little bit longer to reach the right temp but it all depends on your oven and how large your roast is. When in doubt use a thermometer to check it properly :)

When it's all finished you will have a delicious herb infused roast. The flavor really does permeate all of the meat so every bit is herbalicious *grin*.

Bon appetit!
~ Rosina
Tuesday, June 1, 2010

Seed Tape Update

making seed tape

Okay so I told you I'd update you on how the seed tape making was coming along and it is working fabulously!!

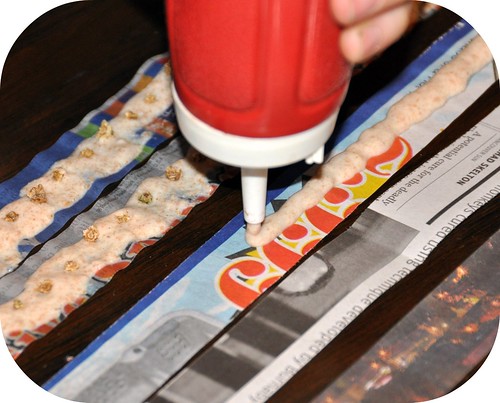
It didn't stick to the table like I had feared with all of the wet newspaper and the seeds stayed put *grin*. So tonight we started another batch and I came up with a genius way to get the flour paste on! Instead of brushing it on with a paintbrush which was a little tedious as the paste is so sticky and doesn't spread especially well we used a squeeze bottle.

I had an old bottle that we used to take camping for putting ketchup in that hadn't made it into the junk box yet and I thought that I would just see if I could get the paste to squeeze smoothly through the spout. I made the flour and water paste the same as yesterday, the consistency of pancake batter making sure that I got as many of the lumps whipped out as I could and it flowed through the tip perfectly.

What a time saver!! Now we can just whip a strip of paste down the strips of newspaper in mere seconds and sprinkle seeds to our hearts content *grin*. We're heading out rain or shine tomorrow to start planting them in the garden :)

How about you, what are you up to in your garden right now?
~ Rosina

Monday, May 31, 2010

Making Seed Tape

making seed tape

I don't know about you but it seems that every year when little hands help plant the vegetable garden there is an inevitable spillage of seeds. Most of the time it's the carrots... those teeny tiny seeds you can barely see once they hit the dirt. There's not much you can do once it happens but wait for a rogue patch of Nantes to poke up in the middle of a pathway somewhere *grin*.

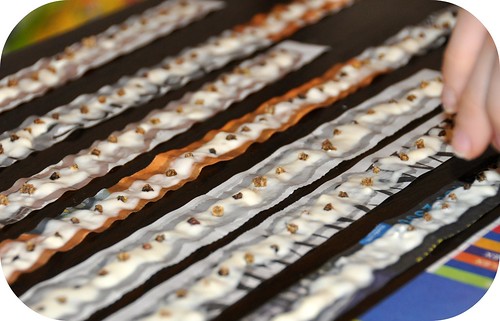
This year we're going to experiment and make our own seed tape :) I ran across a blog post somewhere out there in bloggy land (sorry can't remember which one) where they made a paste of flour and water to *glue* the seeds to newsprint on little dots of paste.
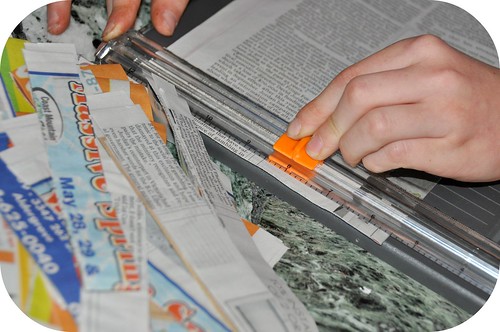
So we got out some newspaper and using my Fiskars cutter K sliced one inch strips of paper that we spread out all over the kitchen table.

making seed tape

For the glue we mixed 1/2 a cup of flour and water together. I don't have an exact measurement for the water but I just dribbled in water and mixed until it was a nice sloppy consistency similar to pancake batter. How's that for mental imagery! *grin*.

To spread the paste we used a large paintbrush and rubbed the paste down the lengths of newspaper making a thick layer of it down the center and then placed the seeds on top of the paste. So far we've just done some of the beet seeds as a trial run. I didn't want to do to many just in case something horrible happens like the newsprint glues itself to the table or all of the seeds end up falling off *grin*.

They're still wet so I'll have to update you again tomorrow on how they turn out and if all goes well we're going to have these great strips of seeds to just lay on our rows for planting in the vegetable garden! Can't wait to update you on how it works out :)

~ Rosina
Sunday, May 30, 2010

Triple Protection Weed Barrier

bean pathway

After spending days ripping knee high grass, thistles and salmon berry bushes out that had taken over my pathway behind my bean netting I decided that I would never do it again! It was time to take action and bar those weeds from ever returning *grin*.

bean pathway

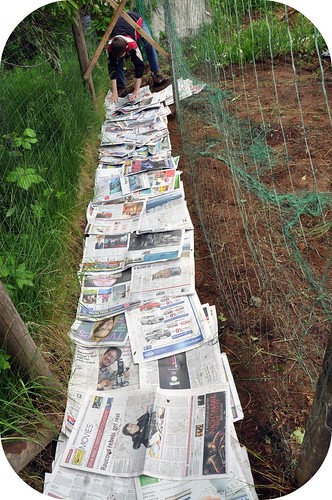
I knew my obsession with reading tons of newspapers would come in handy one day! LOL. Armed with a wheelbarrow full of them we headed out to the garden to get started. Newsprint makes an excellent weed barrier as it smothers anything that is trying to grow up from underneath and over the years it biodegrades and turns to mulch for the soil.

bean pathway

Just make sure that you use only the newsprint and not any of the glossy and shiny flyers. They're an entirely different breed of paper and aren't good for this sort of project :) We layered the papers over top of each other multiple times all the way down the path creating a thick cushion of newsprint over the soil.

bean pathway

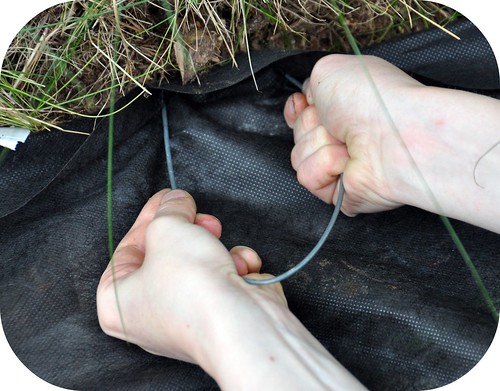
I'm not taking any chances though with rogue weeds popping up through any cracks in the paper so I'm upping my efforts in weed control and putting down a layer of landscaping felt on top of the papers to *grin*. We have scads of left over fencing wire from the last time we fenced so I got hubby to snip off short lengths of it that I could fashion it into staples for holding down the landscaping felt :)

bean pathway

You can see above how I bent the wire into a U shape and then we poked it through the landscaping felt and into the soil so that it securely holds the felt in place and now it won't slip around on the newspaper. It's also great for getting the felt nice and taut for a smooth surface :)

Hauling bark mulch

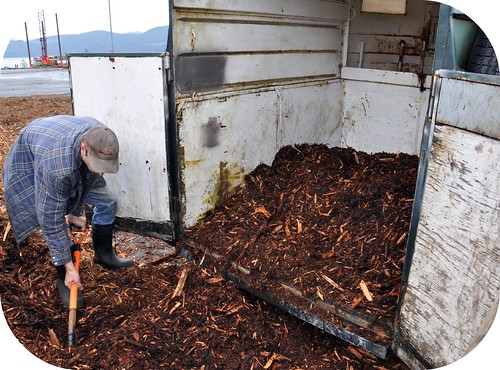
Now I know you probably thought I was done after laying down 2 layers of newspaper and felt, but heck no I'm going for more protection yet! LOL. We hitched on the horse trailer and headed off to grab some bark mulch. Off we go with the trailer in tow *grin*.

Hauling bark mulch

You've just got to love this stuff! It's a by product from the peeler that works nearby so there's always tons of it and it is fabulous for pathways, mulching your garden to help it retain moisture during the dry season of summer and it's a great weed deterrent as well :)

Just make sure you don't use Cedar!! It is poisonous to many plants and you don't want to kill your pretty blooms or vegetables.

bean pathway

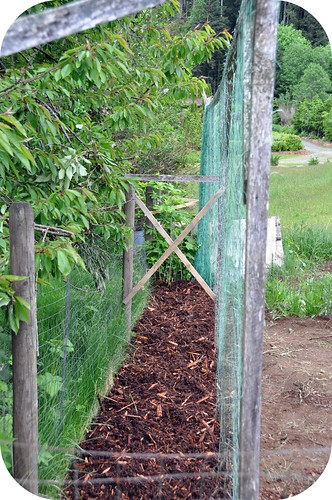
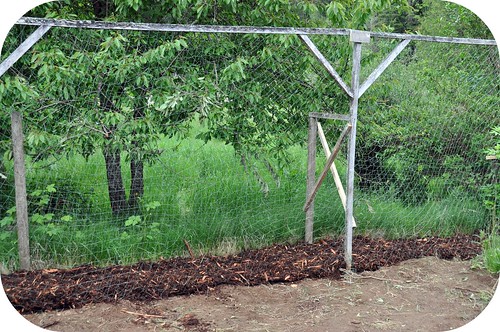
Ahh, finished. Triple protection from the weeds that should last for a couple of years before I need to top dress it again with more mulch :) Now let's get planting!

~ Rosina

Friday, May 28, 2010

Spring Blooms

chive blooms

Some of the pretty blooms that are out around the yard.

You've got to love chives! Deliciously edible green stalks and if left to bloom gorgeous lilac blooms will appear that are not only pretty to look at but add a nice spicy kick to salads :)

Lupin bloom

Volunteer Lupins that have self seeded themselves all along the gravel driveway. These beauties just love to reproduce themselves and love poor soil. Don't try to dig up a mature plant though for transplanting. They have a tap root like a dandelion and don't take kindly to being moved. Start them by seed and they will double and triple in numbers all by themselves the following years :)

columbine bloom

A wild Columbine or Aquilegia that we found growing in the hay field. Aquilegia is derived from the latin word aquilinum which means 'eagle like' because the spurs on the ends of the flowers are compared to the talons of an eagle. I just love the native species but you've got to see the hybridized doubles. They have the prettiest petals that look just like layers of petticoats :)

rhubarb bloom

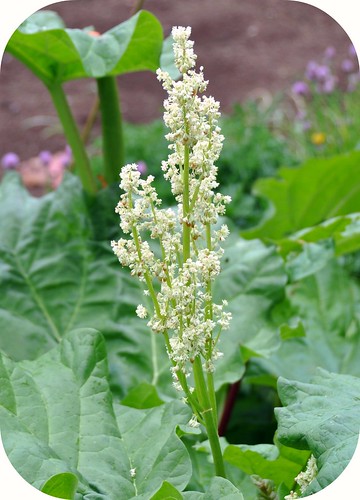
I can't believe it but our rhubarb is already starting to go to seed! They have these very tall spikes covered with little white flowers and if you let it finish blooming it will actually produce seeds. Yes, you can grow rhubarb from seed!!! My mom has quite a few pots of them growing right now from last years seed and I must say they are growing at a very vigorous rate to. I'm going to pinch off the bloom though as I want to keep producing yummy stalks of rhubarb to eat *grin*.

What is flowering in your yard right now?
~ Rosina

Thursday, May 27, 2010

Bean Netting

Bean netting

The sun was out today finally and with Hubby home I thought that I better grab him quick and get some of the manly jobs done around the yard *grin*.

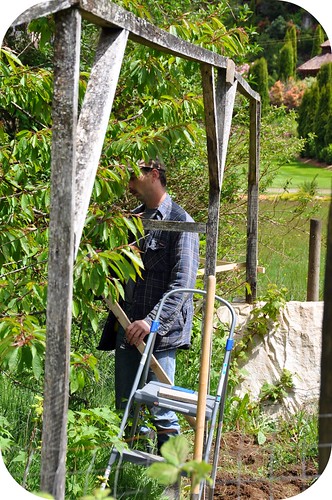
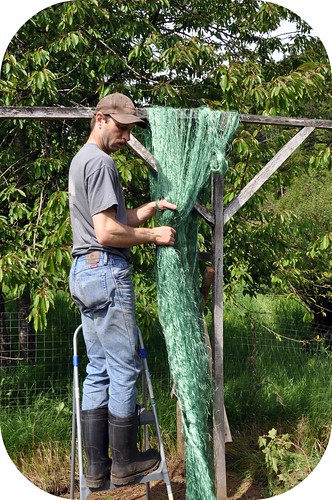
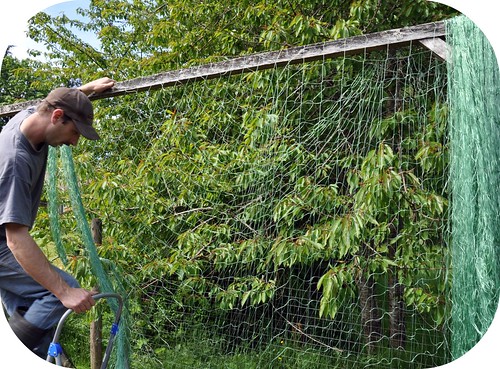
The old bean fence in the garden is starting to fall apart and tip but I'm going to squeeze one more season out of it! So hubby braced it up and it's nice and sturdy again so I can hang some netting on it for the beans to climb on :)

Red wagon

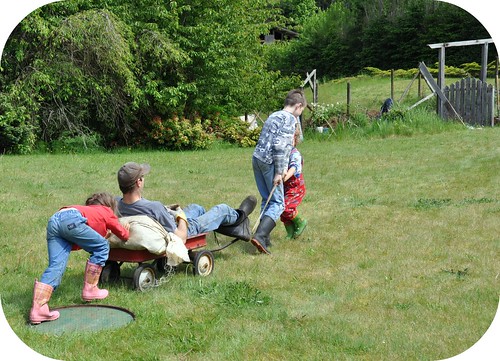
We have loads of old gill net from Hubby's grandpa packed in giant sacks and when I loaded it into the kids' little red wagon he decided that he needed a lift to *grin*. The kids were up to the challenge and towed daddy around and around the yard, even up the hill in the front yard so they could run him back down at break neck speed. A couple times I thought for sure they were going to tip him right out of the seat!

Bean netting

I love using the gill net to grow the beans up. It's nice and light weight and anywhere there are fishermen there is bound to be some old net that is to damaged that they no longer want to repair it and will give it away :)

Bean netting

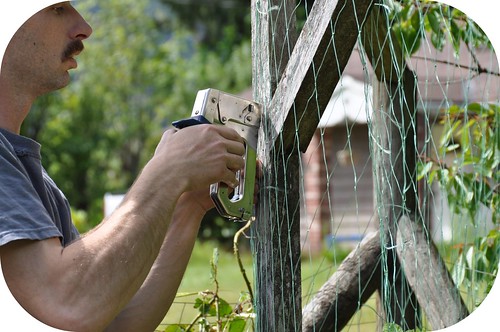
As we stretched it over the stand hubby staple gunned it to the posts.

Bean netting

I don't have a photo of it completely finished but you get the idea *grin*. Tomorrow I'm going to lay down landscaping felt on the ground behind the stand and cover it with bark mulch to keep the weeds from taking over again. I just spent the last two days ripping out the last of the salmon berry bushes, thistles and knee high grass that had taken over along the perimeter of the fence. What a nightmare! That's what happens when you neglect your weeding duties LOL.

Each day take us a little bit closer to finishing all of the weeding, prepping and planting and then it'll be on to easier tasks like just watering. For now I can only dream :)

~ Rosina

Work in Progress

Granny Squares

How is it that I can have a million different projects on the go and life seems to sweep me from one to the next at lightning speed depending on the season *grin*.

My poor granny squares have become lost in the piles of fabric, dresses half finished and quilts waiting to be stitched :) Thank goodness the Granny A Day project is a year long one because the garden is calling me these days and all craft projects have been temporarily left in the dust! By the looks of the above picture you can tell that I have quite the menagerie of blocks in different sizes and it may be a feat in itself just to put it together in blanket form! LOL.

I came across my little stash of them as I was tidying up my yarn and thought I'd post a quick photo for those participating in the project if you stop by to see what I've been up to *grin*. Shamefully I must admit I'm going rather slow!

How about you. What WIP's (works in progress) do you have waiting for your return right now?

~ Rosina

Tuesday, May 25, 2010

Trout Fishing

trout fishing

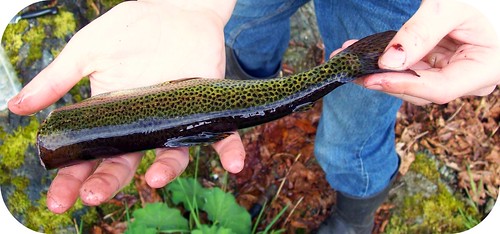
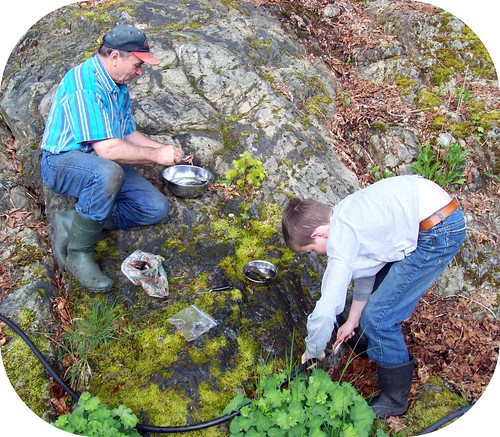
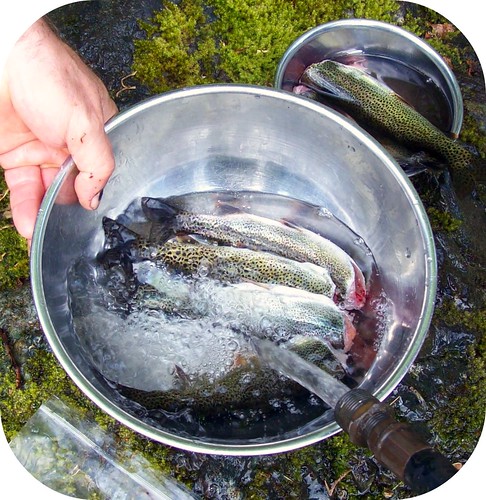
The boys decided that they needed a fishing break today so Opa and K headed of to a nearby lake for a little trout fishing :) They were only gone a little over an hour and they were back with 8 nice cut throat trout. The above photo is K showing off one of his :)

trout fishing

It was like watching myself as a little girl. Dad used to take my sister and I fishing all the time and we learned to be masters at baiting our hooks with worms and cleaning fish *grin*. So now to watch my dad take K and to hear all of their funny stories of the big one that got away, bobbers & hooks that got caught up on the snags, or how K's leg shakes uncontrollably every time he catches a fish is just priceless :)

trout fishing

One very nice perk to all of the fishing is the heads left after cleaning. They make FANTASTIC fertilizer for plants!!! You can throw them underneath any flowers that you are planting and they will be bigger and have more blooms than ever before :)

Works great for the vegetable garden to! If you have a spot in your garden that you can spare, dig a hole, drop in the fish guts and then cover it up well. Next spring you will have some very good fish compost just like the sea soil you can buy for fertilizing your vegetables with :)

Trout fishing

Now that they're all finished being cleaned we're going to have them fried for lunch tomorrow. So delicious and great brain food to *grin*.

Bon appetit!
~ Rosina