
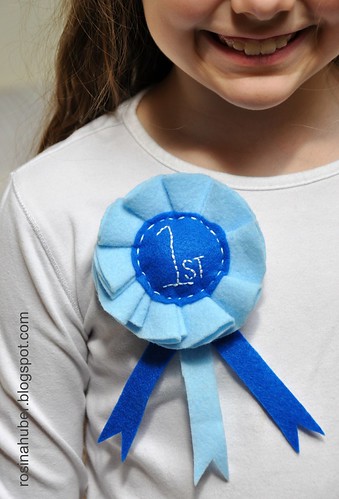
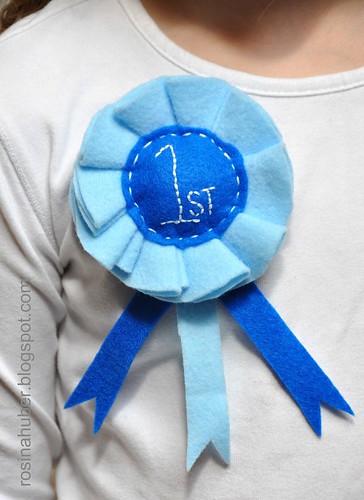
My daughter has a fun little my first pony book that she was given on her birthday a few years ago and inside was a game to play and little paper award ribbons to give to the first, second and third place winners. Well over the years the paper rosettes have grown rather worn and we've replaced a few ourselves but this time I thought it would be fun to make a really nice one out of felt that would really last and share the tutorial on how we did it with you :)

As this was supposed to be her project with just mama supervision I got her to do all of the tracing and cutting so you might see in some of the photos that there is a little bit of black ink showing on the tips of the felt ruffles :)
We started with a glass that was 3 inches in diameter, using it as our template for our ruffled rosette and traced twelve of them to be cut out of our felt.
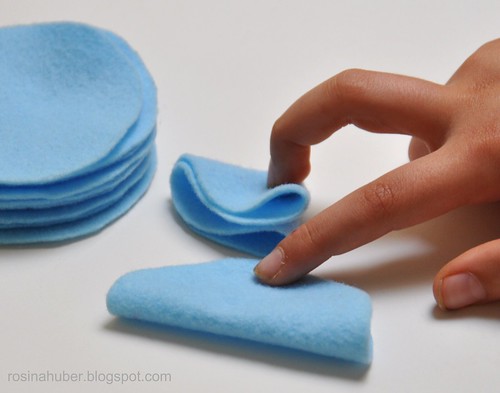
Once our circles were all cut out we moved onto the next step of folding them into little triangular sandwiches by folding the circle first in half and then in half again just like in the photo above for just 10 of them....
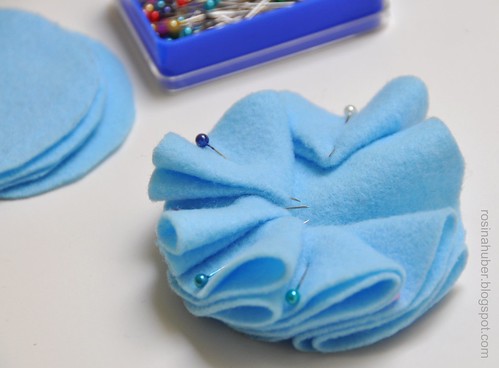
and then started to space them as evenly as we could around one of the leftover circles.
This part is a little tricky so I helped her out and to make it a little easier on myself for the spacing I took four of the folded circles and placed them onto the base at the north, east, south, and west compass points so that I had a rough idea of how far apart to put the remaining pieces.
As you pin each one down you want it to overhang your backing by about a 1/4 to 1/2 an inch. You definitely don't have to be precise! But you do want to have that extra space so when you sew on your final backing at the end it will hide any embroidery stitching and so on that will be visible on the underside.
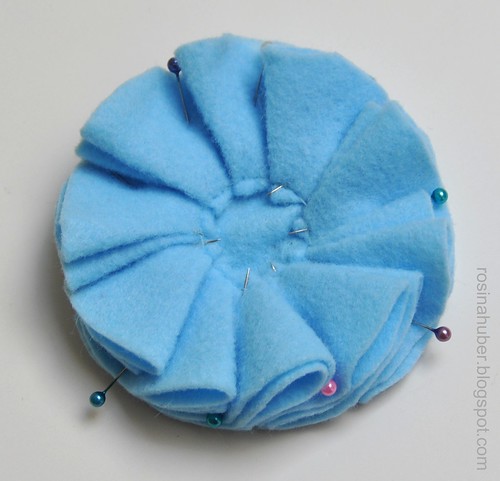
With all of the pieces pinned down she used a bit of regular cotton sewing thread and hand stitched all the way around the base of each of the points to tack them down in place.
DON'T remove your pins yet! Trust me keeping them in will keep your rosette nice and stable as you continue to work on it :)
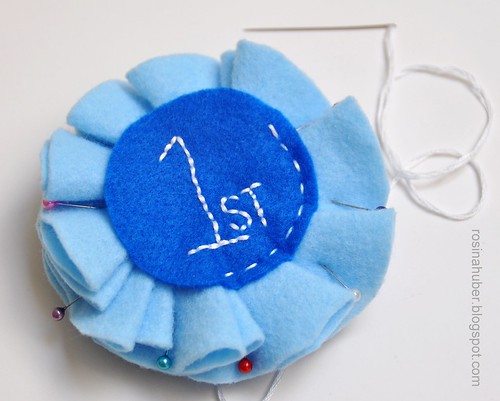
So with everything stitched in place we used a smaller glass, this time 2 inches in diameter, to make our rosette center. It really doesn't matter what sizes your glasses are as long as they are both roughly 1 inch different in diameter from each other.
She thought it would be nice to use a darker blue felt for the center and I agree that it really did make the rosette pop!
I helped again with this part, embroidering the first place onto the felt with white embroidery floss and just using a running stitch to secure it to the front of the rosette.
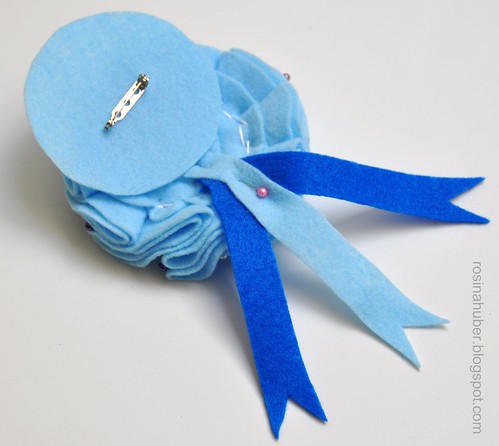
You will notice that you still have one of your 3 inch circles from the very beginning left over and this is going to be your backing. You will also need to cut three strips of felt 5 inches long and 3/4 of an inch wide for your ribbon tails.
Position your three ribbon tails how you would like them to look and pin them onto the backside of your rosette with their ends far enough towards the center that they will be fully hidden when the backing is stitched on.
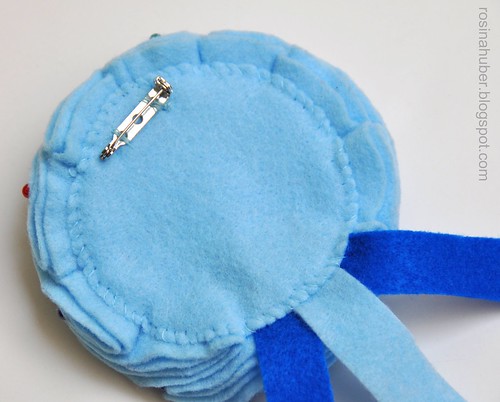
To finish we just used regular cotton thread again and my daughter used a simple whip stitch to secure the backing to the underside of her rosette hiding all of our knots and not so pretty stitch work *grin*. The final touch was to add a brooch pin that I luckily had but you can easily find them at any hobby/craft store or even your local dollar store may have them down the craft isle.
And that's it!
A super cute blue ribbon rosette for the winner in your household :)
You could personalize these with pretty much any little saying. They would make great birthday boy/girl ribbons, or don't forget about Mother's day that is coming up this weekend. I can see this with #1 MOM on it just for me *grin*.
Have fun making some :)
Hugs,
Rosina


5 comments:
Super cute, indeed!
OH, I am loving this idea!
Hey Rosina! Just checking in to see if you are OK. (((hugs)))
Interesting blog with lots of handmade sharing. 荷田歯科
I like this web site very much so much great info.
Post a Comment