Showing posts with label vegetable. Show all posts

Monday, December 6, 2010

Roasted Potato & Leek Soup ~ Recipe

Potato and Leek Soup

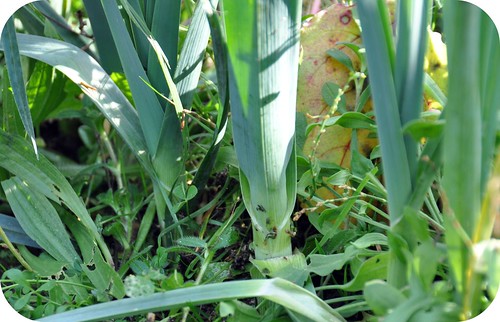
Remember those leeks that I mentioned having left in the garden? Well I did finally pull them up but not until after they had been hit by a hard frost *grin*. I had planned to make soup with them so I wasn't to worried if they froze but you know what, when I pulled them out of the frozen soil they came out perfectly clean! Now if only I could pull them out of the ground like that all the time :)

I was really excited to try making a creamed leek and potato soup using some of the potatoes and rosemary that came out of our garden as well.

I started by cleaning 12 of my leeks by trimming off the hard green tops and the roots leaving the nice white fleshy bottoms and then splitting them in half. My leeks were only 1/2 - 1 inch in diameter so if you are buying leeks you could use 4 really nice large leeks :) I then added 8 peeled and cubed medium sized potatoes, 1 large sweet onion such as a walla walla quartered, 1 large red pepper cut into large chunks and 2 sprigs of rosemary.

Place all of your vegetables into your roasting pan, toss with a generous splash of olive oil, some salt and pepper and roast at 400 degrees Fahrenheit for about 30 miutes or until all of your vegetables are fork tender. Mmm, the smell of them roasting is delightful *grin*.

Potato and Leek Soup

Once your vegetables are cooked and slightly cooled it's time to pureƩ them in your blender :) Place a couple large scoops of vegetables in your blender with a good splash of milk and blend until smooth.

I decided to make my soup milk based but you could use chicken or vegetable stock in place of the milk if you like! I also found that the potatoes made the mixture quite thick while they were in the blender so if you have one of those stick blenders that might make quicker work of the blending so that you don't have to do multiple batches in the blender :)

Once you have pureed all of your veggies you can adjust the thickness of your soup by adding more milk or stock and season with additional salt and pepper to your liking :)

Potato and Leek Soup

This is a delighfully filling soup and the roasted vegetables give it a yummy flavor. Plus with it being so smooth and creamy your children will have NO idea what is in it *grin*. The perfect solution to the picky eater LOL.

I paired it with homemade cheese buns and everyone loved it :) I hope you enjoy making some for your family.

Hugs,
Rosina


PS. Looking for more great recipes? Check out the Hearth & Soul Blog Hop

Tuesday, November 2, 2010

Last Vegetables in the Garden

Red Cabbage

The nights are growing colder up our neck of the woods and with a few frosty mornings lately I thought that maybe we should head out to the garden and pick some of what is left still growing out there :)

Red Cabbage

Any bits of lettuce and radishes that were left behind have now gone to seed but we have a row of red cabbage that is flourishing in the wet weather. I think the kids were quite surprised to find that they had grown so big!

Red Cabbage

Everyone had a turn tearing off the large bug eaten outer leaves and pulling the heads, roots and all out of the soil :) Harvesting is sooo much more fun than weeding! I don't remember seeing so much enthusiasm when it was time to pull chickweed, thistles and other weeds *grin*.

Red Cabbage

Here's one of our larger ones. It must have been around 8 inches in diameter and quite heavy. As I had my little mini photo shoot with the kids you could see that their arms were getting quite tired from lifting them up *grin*. They're such good sports for their mama LOL.

leeks

All that's left now are the leeks. They are doing fabulously despite being completely surround by weeds *grin*. We stopped weeding a while ago. Part laziness, part master plan as the weeds were covering the soil and keeping it much more moist than when the dirt was open to the sun and then it dried out so quickly. Haha, see there is a method to my madness!!

I'm not quite ready to pull them all as there are way to many to just eat so I would have to blanch them for freezing so I think I might mulch them and see if I can prevent them from freezing and be able to pull them fresh from the garden as I need them :) How long do you leave your leeks in the garden?

Hugs,
Rosina

Friday, September 3, 2010

Purple-licious Beet Ravioli ~ Recipe

fresh beet pasta ravioli

I promised you a great beet recipe and here it is!
A delicious pasta made with fresh beets from your garden and turned into a stunning purple ravioli :)

fresh beet pasta ravioli

Don't you just love the color of this?!

To get your dough started you need to cook 3 or 4 fist sized red beets with their skins intact and just the tops trimmed off. That will keep them from bleeding to much in the water as they cook. It takes roughly 30 minutes for them to be fork tender when tested and once they are cooked you can dump them into your sink and you just grab them and give them a bit of a squeeze and they will pop right out of their skins *grin*.

You need two cups of pureed beets so add them chunk by chunk into your blender until you reach the 2 cup mark and then you will continue pureeing them along with 1 egg and 1 tablespoon of olive oil until they are nice and smooth.

fresh beet pasta ravioli

To finish your pasta dough you will need:

2 eggs
3 1/2 cups of flour
1 teaspoon salt

Place your flour and salt in a large bowl or directly on your counter and make a nice big well in the center. In the well add your eggs, and beet puree.

With a fork slowly start to beat your eggs, mixing them into your beet puree and then start to gradually pull the surrounding flour into your wet ingredients until it has taken on a dough like consistency and you can start to work it with your hands. It takes about 10 minutes to get a beautifully soft and silky dough by hand or about 6 minutes if you are using your mixer with the dough hook attachment :)

Once you've finished kneading cover your dough with a greased bowl and let it rest for 20 minutes.

fresh beet pasta ravioli

Now comes the fun! Using your pasta machine work your dough through it, dusting it with flour as necessary and gradually tightening the rollers until you have a really thin dough roughly 3mm thick. If you don't have a pasta machine you can definitely use your rolling pin to roll out your sheets of dough as well!

I made a really quick potato, bacon & cheese filling by steaming potatoes until tender, mashing them smooth, adding 1/2 pound of cooked and crumbled bacon, one medium sized sweet onion that I diced and sauteed, stirring it all together and then seasoning it with salt & pepper.

My husband loves this perogi type filling but you could easily use spinach & feta or pine nuts & chard with goat cheese or... well the possibilities are endless *grin*.

fresh beet pasta ravioli

Place a teaspoon sized blob of your filling in increments roughly 2 inches apart down the length of your first piece of dough and then top with a second rolled out length of your beet dough. Then using a butter knife or pizza cutter slice each section of dough apart and fold each edge over itself and lightly press it with a fork to seal each little ravioli pocket.

fresh beet pasta ravioli

That's it! You've got some beet-a-licious ravioli to serve your family :)

To cook your ravioli bring a large soup pot of salted water to a boil and cook your ravioli for about 10 minutes. You don't want to cook them at a rapid boil though as this might tear your little raviolis apart so reduce the heat so they gently boil in the water. This will reheat your filling and make sure that the thicker folds of dough around the edges cook through.

You know I completely forgot to take a photo of them cooked! We were so excited to taste them that we devoured them before I even thought to grab my camera *grin*. I can tell you that it was plenty for our family of 5 for dinner with fresh garlic bread (there's a really easy recipe here) and a cucumber salad. Mmmm, so good!

Have fun making some for your family :)

PS. Check out the Wholesome Whole Foods and Food Renegade weekly link up for more great recipes and articles :)

~ Rosina

Monday, August 30, 2010

Bumper Crop of Beets

Beets

My mom has an AMAZING vegetable garden every year and this year she has a bumper crop of beets. Of course she is more than happy to share her vegetable wealth with her daughter LOL.

Beets

So this morning after feeding the cow the kids and I walked over and brought our wheel barrow along with us *grin*.

Beets

My mom and I plucked out beets by the handful and my dad cut off all of the beet tops. Dad's getting out of the house more now so it was great to see him doing something he enjoys :) By the time we were finished there was heaps of beet tops that are going to be a wonderful treat for the cow tomorrow morning....

Beets

and plenty of beets to take home and cook up! I boiled up 2 big canner loads this afternoon. I just love how easy they are to prepare! After they are cooked their skins just pull off like butter and tomorrow I'm going to chop them all up and make pickled beets. SO GOOD.

Beets freeze really well to so I'm going to get a couple more canner loads sometime this week and get them frozen up so we can enjoy them all winter long :)

~ Rosina

Friday, July 16, 2010

Kohlrabi Fries ~ Recipe

kohlrabi fries

I don't know why I've never tried growing Kohlrabi in my garden, I eat it all the time! It's sort of alien looking with it's white bulbous bottoms and leggy appendages growing out of it all over the place but it is fabulous eaten raw, grated in salads and now as fries :)

kohlrabi fries

I know you're probably thinking how in the world did I figure I could turn that into fries *grin*. Everyone these days seems to be roasting sweet potatoes or yams, cauliflower and who knows what else in order to replace the good ol' potato and I thought why not Kohlrabi?! LOL.

It's a member of the cabbage family and personally I think that when eaten raw it tastes sort of spicy like a radish and we love radishes so they are a huge hit here plus they pack a wallop of vitamins in each crispy bite.

kohlrabi fries

To prepare your kohlrabi for roasting you treat it like a turnip. Cut off all of the leaves, slice off the top and the root ends so it balances nice and flat on your cutting board and slice off all of the outer skin. Don't be to skimpy when peeling as it can be a little woody under that tough skin if you don't peel enough off.

kohlrabi fries

Next you just slice it into roughly 1/2 to 3/4 inch sections and then across each of those sections just as if you were cutting up potatoes for french fries. No different at all.

kohlrabi fries

Toss with a little olive oil, salt & pepper and roast them on a greased pan at 400 degrees fahrenheit for about 40 minutes or until they are tender and golden brown just like mine in the above picture.

YUM!! When my father was a young boy in Austria they grew these by the truckload on the farm and they would eat them raw all the time so it was a great treat to bring some for him at lunch time :)

Trust me, you've got to try these at least once. If you bake yours a different way let me know. I would love to know! P.S. Check out the Wholesome Whole Foods weekly link roundup for more great recipes and articles :)

~ Rosina