Showing posts with label recycle. Show all posts

Monday, November 8, 2010

Think Globally... Act Locally

K recycling project

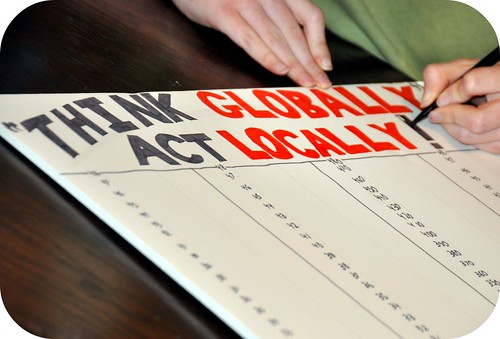
K's grade 6 social studies this year is all about being a good global citizen and how to "Think Globally and Act Locally" and it just happened that on Saturday the Plastic Pollution Coalition aired a live broadcast all day of it’s TEDxGreatPacificGarbagePatch conference. We both watched on and off throughout the day and it was SO INSPIRING to hear about how people around the world are banding together to end plastic pollution and just as equally scary to see just where our plastic garbage is ending up.

K recycling project

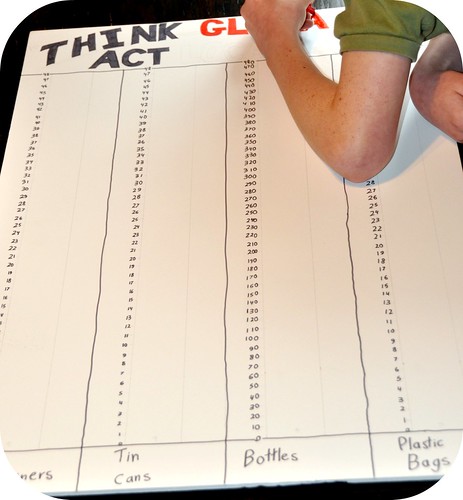
So we decided that we would start a project that would take us through recycling everything we possibly could and doing a weekly weigh in to see just how much plastic, tin, bottles and so on that we actually use every week. Through this we will be able to track our consumption, work on using less and help us to make smarter purchasing choices to further reduce our plastic waste!!

Our goal is to chart our findings with bar graphs from now until the end of May which is when we usually wrap up our school year and get everyone involved and caring about what is happening in our trash and shopping baskets. My 4 year old has been keeping tabs on what we are putting in the trash to make sure we don't accidentally throw away something we can recycle *grin*. It's great!

I love what J.D. Russo said..
"We need to raise CARE, instead of AWARENESS".

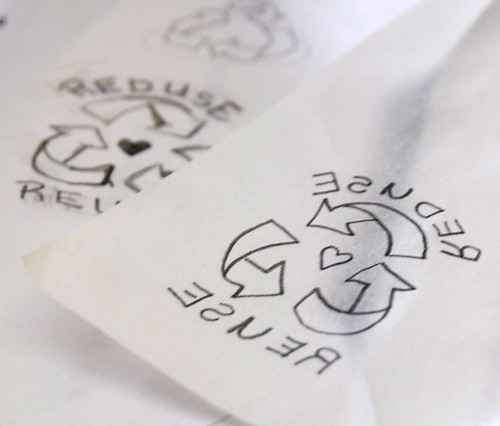
Everyone knows that they need to recycle, reduce, reuse and so on but we need to get more people to really feel it and to care about why they should be doing these things. If you've got a minute you should check out his short talk below... He's 14 years old by the way :)

Hugs,
Rosina


Saturday, May 8, 2010

Recycled Leather Cell Phone Case

Cell Phone case

My mom has to be one of the few people that don't actually own a cell phone :) I must say at times I envy that she doesn't have one as I personally don't like mine and conveniently leave it in the trunk of my car *grin*. Shhh, don't tell my hubby! LOL. He uses his for work on the tugs so chats on it constantly but mine is pretty much for emergencies only and I avoid it like the plague!

Mom has been hinting that she wanted one and when we switched our cell phone plan a couple of years ago we got new phones and my old one has been kicking around in the junk drawer ever since. So as a special surprise I've had it activated for her on one of those pay as you go plans :) There is no cell service where we live so it only works when we head into the city but it comes in super handy when trying to meet up with my sister or if someone needs something brought home. So the pay as you go will be much cheaper than having a plan as I'm sure the $10 card will be more than enough for a month.

Cell Phone case

I found some really great red leather scraps at an upholstery shop and a leather skirt at the salvation army that were perfect to upcycle into a snazzy cell phone case. Most purses are like giant manholes and just swallow up things as they go in... well at least mom's and mine are so I thought I would make a case for her phone to go in so that it might be easier to locate it when it rings :)

I wanted to give it a two tone look and started by sketching out circles on paper to figure out my design before chopping into the leather. Who knew circles could be so hard! It took me a bit to work out the spaces in between each one where I had my little peek a boo triangles as it looked totally different with the pen drawings than it did when you flipped it over and looked at it like it was the leather.

Cell Phone case

Next was putting all of the pieces together which was quite fun. I love figuring out all of the dimensions. It's like a puzzle :) In the past I have given my mom my phone to hang onto when I haven't had a purse and when it has rung she has gone into a bit of a frenzy scrambling to get to it before it stops ringing so I thought having a ribbon inside that popped the phone out of the case easily would be fantastic! I stitched a button hole shape into the backside of the case, clipped it open and slid some nice wide grosgrain ribbon through it and looped it inside the case.

Cell Phone case

It works fabulously! You pull the ribbon, it shoots out the phone and when you push the phone back in the case it slides the ribbon back down with it and you don't have to try and feed the ribbon back in at all. It does it all by itself! Love it!

Cell Phone case

I can't wait to surprise her with it tomorrow for Mother's Day :)

~ Rosina

Saturday, April 3, 2010

Bunny Fun

bunny bowling pins

It's Easter weekend!!
I like to keep the candy consumption on holidays to a minimum and it's especially hard when everyone wants to give baskets full of those tasty chocolate bunnies at Easter. So to combat the sugar overload that I know is inevitable I've been lovingly creating handmade gifts for the children to replace the candy from mama :)

Oh my goodness, there is no shortage of craft tutorials on the web and you could seriously craft something new everyday till you die! LOL. Needless to say it was pretty easy to find some super cute bunny themed gifts to make :)

I bookmarked these adorable bunny bowling pins last year when thelongthread shared about them on the Storque knowing that I was going to have to try making them! I've been collecting brightly colored fabrics for them and last night in the wee hours of the morning I started cutting, dug out my button stash to sew on their eyes and embroidered their whiskers :)

bunny bowling pins

They're turning out fabulously! I have this wacky sort of quirk about hoarding fabric scraps *grin*. I very rarely throw them away. Larger scraps are kept for quilting and other smaller sewing projects and the selvage and other tiny trimmings that I slice off of my cloth bags that I make I have in bag in the craft closet waiting to be recycled so that I can keep them out of the garbage can. Well this was a perfect project for re-using them!

I stuffed all of the bunny bowling pins with them :) They created super dense and heavy bunnies and the strips compacted nice and tight inside the bunnies just like they had been stuffed with batting. I just finished sewing up their bottoms and can't wait to give them tomorrow as surprise presents :)

Finger puppet bunnies

My little bunny finger puppets that I had mentioned making a couple of days ago have turned out perfectly to. I just LOVE their little pom pom tails and they were so quick and easy to make. My little 4 year old is going to have so much fun playing with them :) Well I better get back to sewing if I'm going to finish off the last minute touches the my goodies.

Happy Easter everyone :)

~ Rosina

Tuesday, March 2, 2010

Give Life To Outgrown Clothes ~ Make Your Own Cloth Napkins

sewing napkins

I'm slowly phasing out all of the paper towels and napkins out of our home, replacing them with cloth napkins and the stash of flannel in my sewing cupboard is finally getting put to good use making lovely soft napkins that the kids love to use :)

sewing napkins

But I started thinking about what else I could find around the house to reuse and give new life to in the form of napkins. With three kids growing like weeds there's never a shortage of to tight pajamas or ones that accidentally got snagged on something and blew out a knee *grin*. So instead of throwing them in the rag bag I dug them out, washed them all up and headed to the cutting table.

sewing napkins

By snipping off the waistbands and cuffs and cutting out all of the seams I was left with 4 panels. Slightly odd in shape but very usable!

sewing napkins

With my rotary cutter & ruler I trimmed them up so that they had nice straight edges. A few of them had ripped knees so I had to trim them a little shorter but out of my 4 year olds pj's I was able to get a good sized 6 x 13 inch rectangle out of most of the flannel panels.

I don't get to use my serger very often so I was excited to be able to stitch, trim & hem all of the sides in seconds *grin*. Boy does that thing zip along! And it just happened that Sew Mama Sew blogged about making napkins using a rolled hem stitch with a serger so I got to brush up on my technique with her handy tutorial :)

sewing napkins

The only drawback to using my serger is those darn thread tails that it leaves behind. A quick fix is to either trim off those tails and dab fray stop or another liquid sewing glue on the corners to hold the threads together permanently or sew them in like I did in the above photo.

I thought that since they are going to get a lot washing with all of the dirty hand wiping that I'd make sure they were never going to come undone. So I took an embroidery thread with a large eye and threaded the tail through the end and then ran it back through about an inch of stitches :)

I love it! New life to old pajamas keeping them out of the landfill and those favorite pj's that your kid insisted on wearing every night to bed because he loved them sooo much are back *grin*.

Have fun reusing something out of your outgrown stash of clothes :)

~ Rosina

Saturday, June 13, 2009

A Work in Progress

Reduce & Reuse Stamp

I've been wracking my brain trying to come up with a fun way to share about recycling on my packages when I mail them so that when they reach their destination the person receiving them knows that they can reuse or upcycle the shipping envelope again so that it doesn't just get tossed into the trash.

It just happens that my son has this great little garbage truck that we picked up at the thrift shop and it's actually a green recycling truck with recycling symbols all over it and it hit me that I could make some sort of rubber stamp with the same sort of sign and then add on my 'reduce' and 'reuse' tag that I love to add into my item listings :) So I fiddled around with the arrows and lettering for a while until I got it just right and then added in a cutsie little heart into the center *grin*.

I've got it all ready to go on my tracing paper, reversed image and all, and tomorrow I'm going to transfer it onto a Speedy Cut rubber pad and carve it out. I can't wait to see how it turns out. I've never done lettering before so I'm not sure how tricky it will be but I'll share how it turns out :)

~ Rosina